This post is based on a tutorial I created to teach students at The Flatiron School the basics of integrating Ajax with Rails. This guide is appropriate for beginners who have already learned the basics of Rails and jQuery.
It will walk you through the process of adding Ajax to a very simple rails app for creating todo lists. First we’ll go through the basics of setting up the Rails app, then adding jQuery and Ajax to add items without reloading the page. Finally, we’ll refactor with remote: true. Feel free to code along!
The Basic Rails Todo App
Before getting to Ajax, here are the steps to create the basic rails todo app we’ll be building on:
1) rails new todo_app
2) rails g resource todo
3) In the migration file (located in db/migrate):
1 2 3 4 5 6 7 8 9 | |
4) In app/controllers/todos_controller.rb:
1 2 3 4 5 6 7 8 9 10 11 12 13 14 15 16 17 18 19 20 21 | |
5) In config/routes.rb:
1 2 3 4 | |
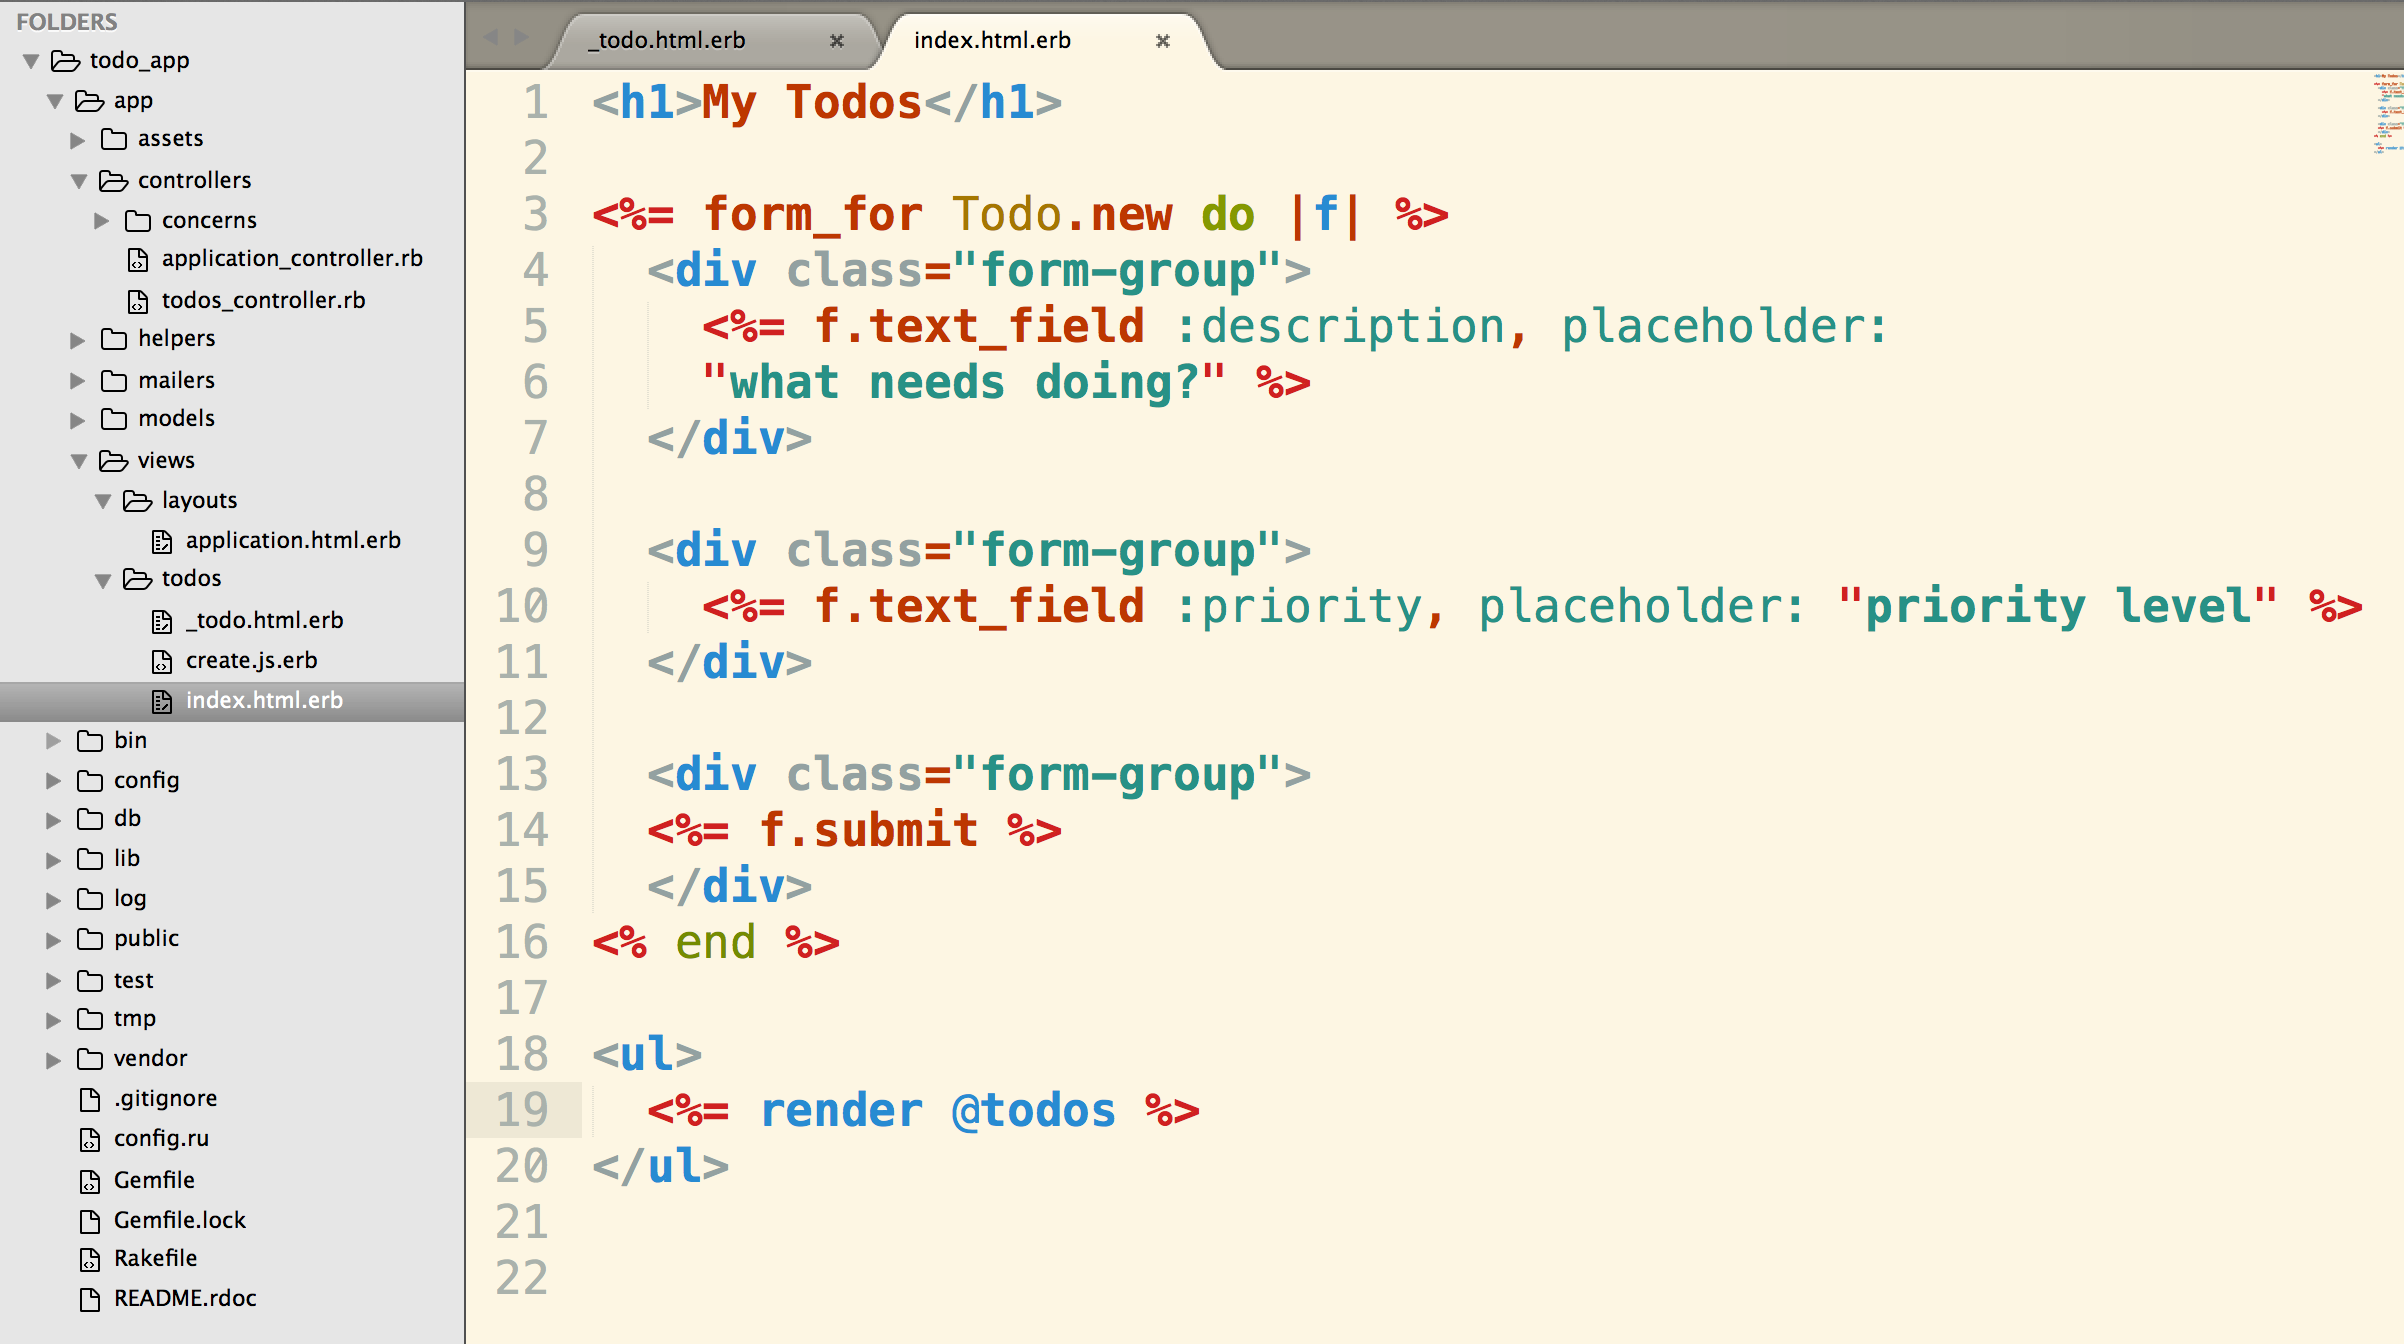
6) Create views/todos/index.html.erb with a basic form and list of todos:
1 2 3 4 5 6 7 8 9 10 11 12 13 14 15 16 17 18 19 20 21 22 23 24 25 26 | |
7) Before starting up the rails server: rake db:migrate
Now we can create new todos and destroy them. This is as functional as our app needs to be. Except for one thing. Since this is a single page app, it would be really nice if we could add and remove todos without reloading the page. Enter Ajax!
Posting New Todos with Ajax
Now we are going to “ajaxify” the process of creating todos. Since we are entering JavaScript land, we’ll go into app/assets/javascripts. You’ll see a file called todos.coffee or todos.js.coffee. We will not be using CoffeeScript, so rename it to todos.js.
Here’s what we are going to implement:
When the “Create Todo” button is clicked, we will stop the default form submission behavior from happening, and send an Ajax request instead. To break this down further, here are the steps we’ll need to follow:
- Create an event listener for the ‘click’ event (or for the submission of the form) that loads when the document is ready and prevents the default behavior from happening (stops the page from reloading).
- Grab some information from the form to use in our Ajax request.
- Make the Ajax request.
- Handle the response and add the new todo to the page.
Create an Event Listener
In app/assets/javascripts/todos.js:
1) Make sure the document is ready before doing anything else.
1 2 3 4 | |
2) Listen for the submission of the form.
1 2 3 4 5 6 | |
3) Prevent the default behavior (the form submitting and the page reloading).
1 2 3 4 5 6 7 8 | |
Grab Information From the Form
In order to make the Ajax request, we’ll need to give the request the correct action and method to take us to the create action in the todos controller. If we rake routes, we’ll see this:
POST /todos(.:format) todos#create
So we know we will be making a ‘post’ request to ‘/todos’. We could hard code this in our Ajax request, but what if our routes change later on? Our request would no longer work. In order to make our code more robust, we’ll get the correct action and method directly from the form itself. Basicaly, we’ll ask the form where it was going by extracting the information with jQuery.
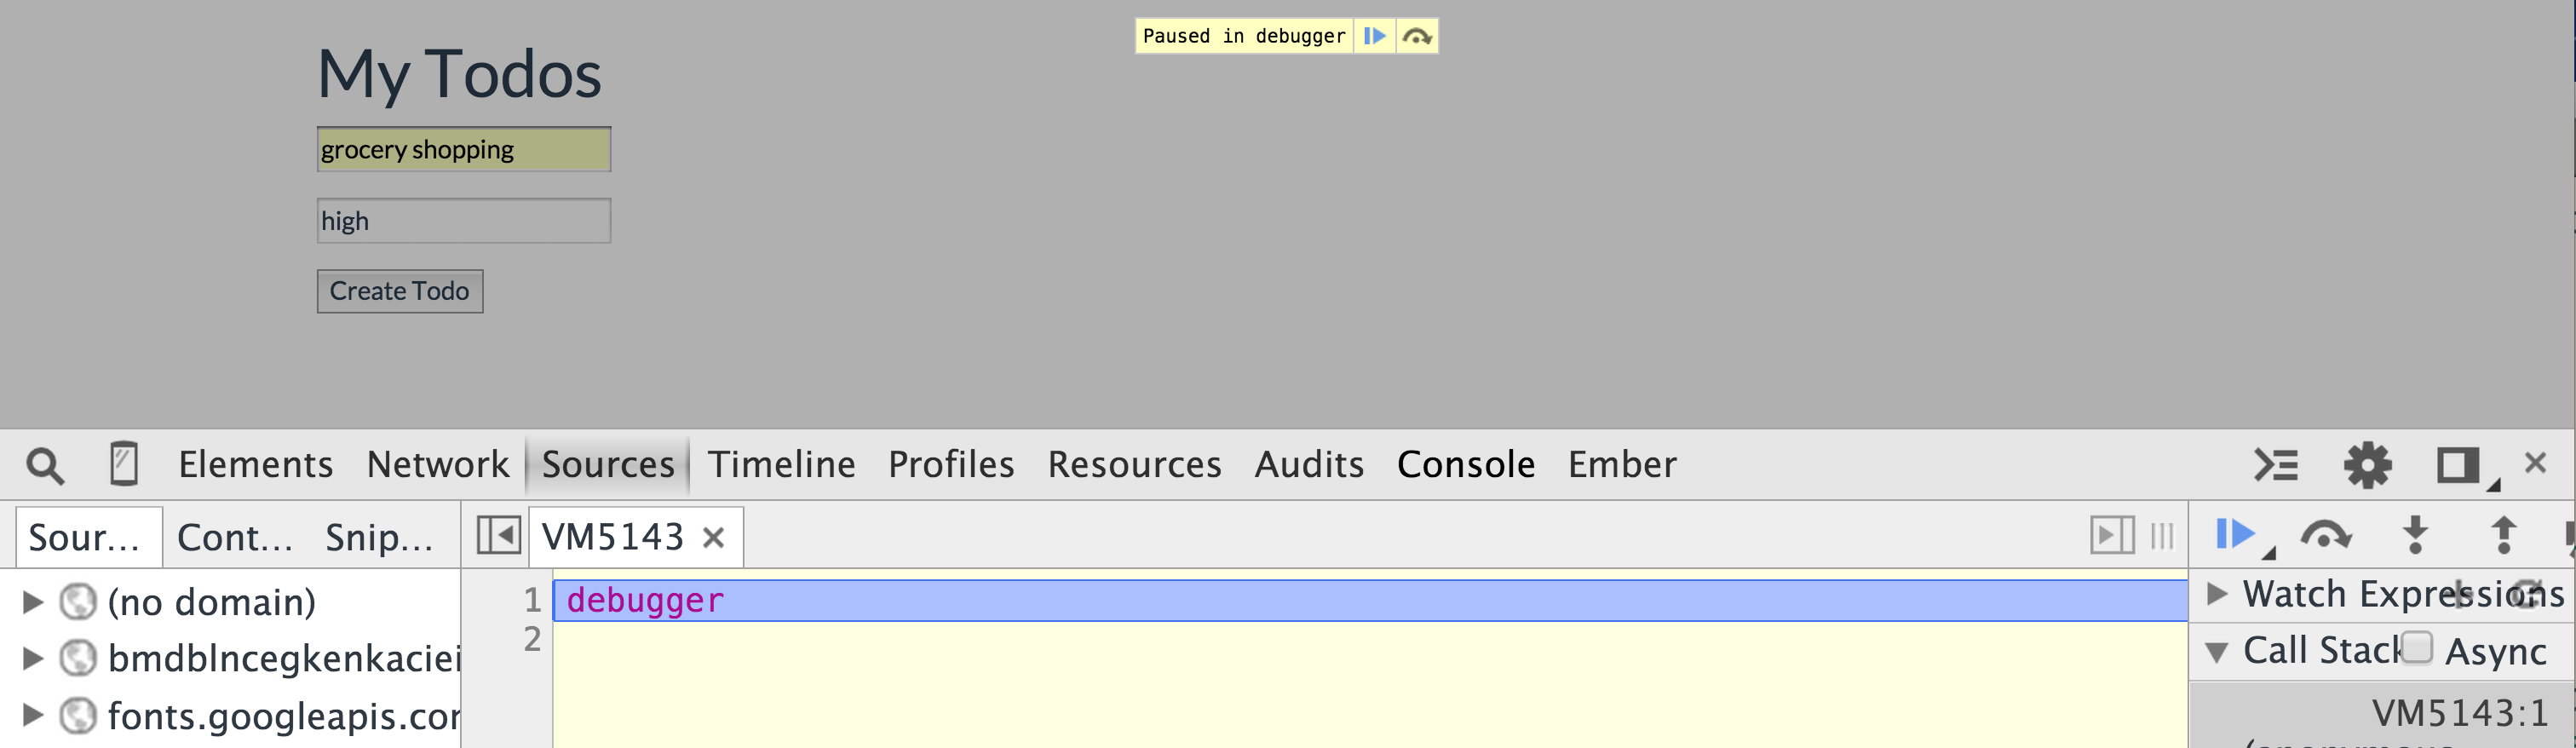
The debugger we threw into our code above will be really useful in figuring out the jQuery code for pulling out the information we need. With your server running and your JavaScript console open, fill in the form and hit the submit button. When the debugger gets hit, what is this?
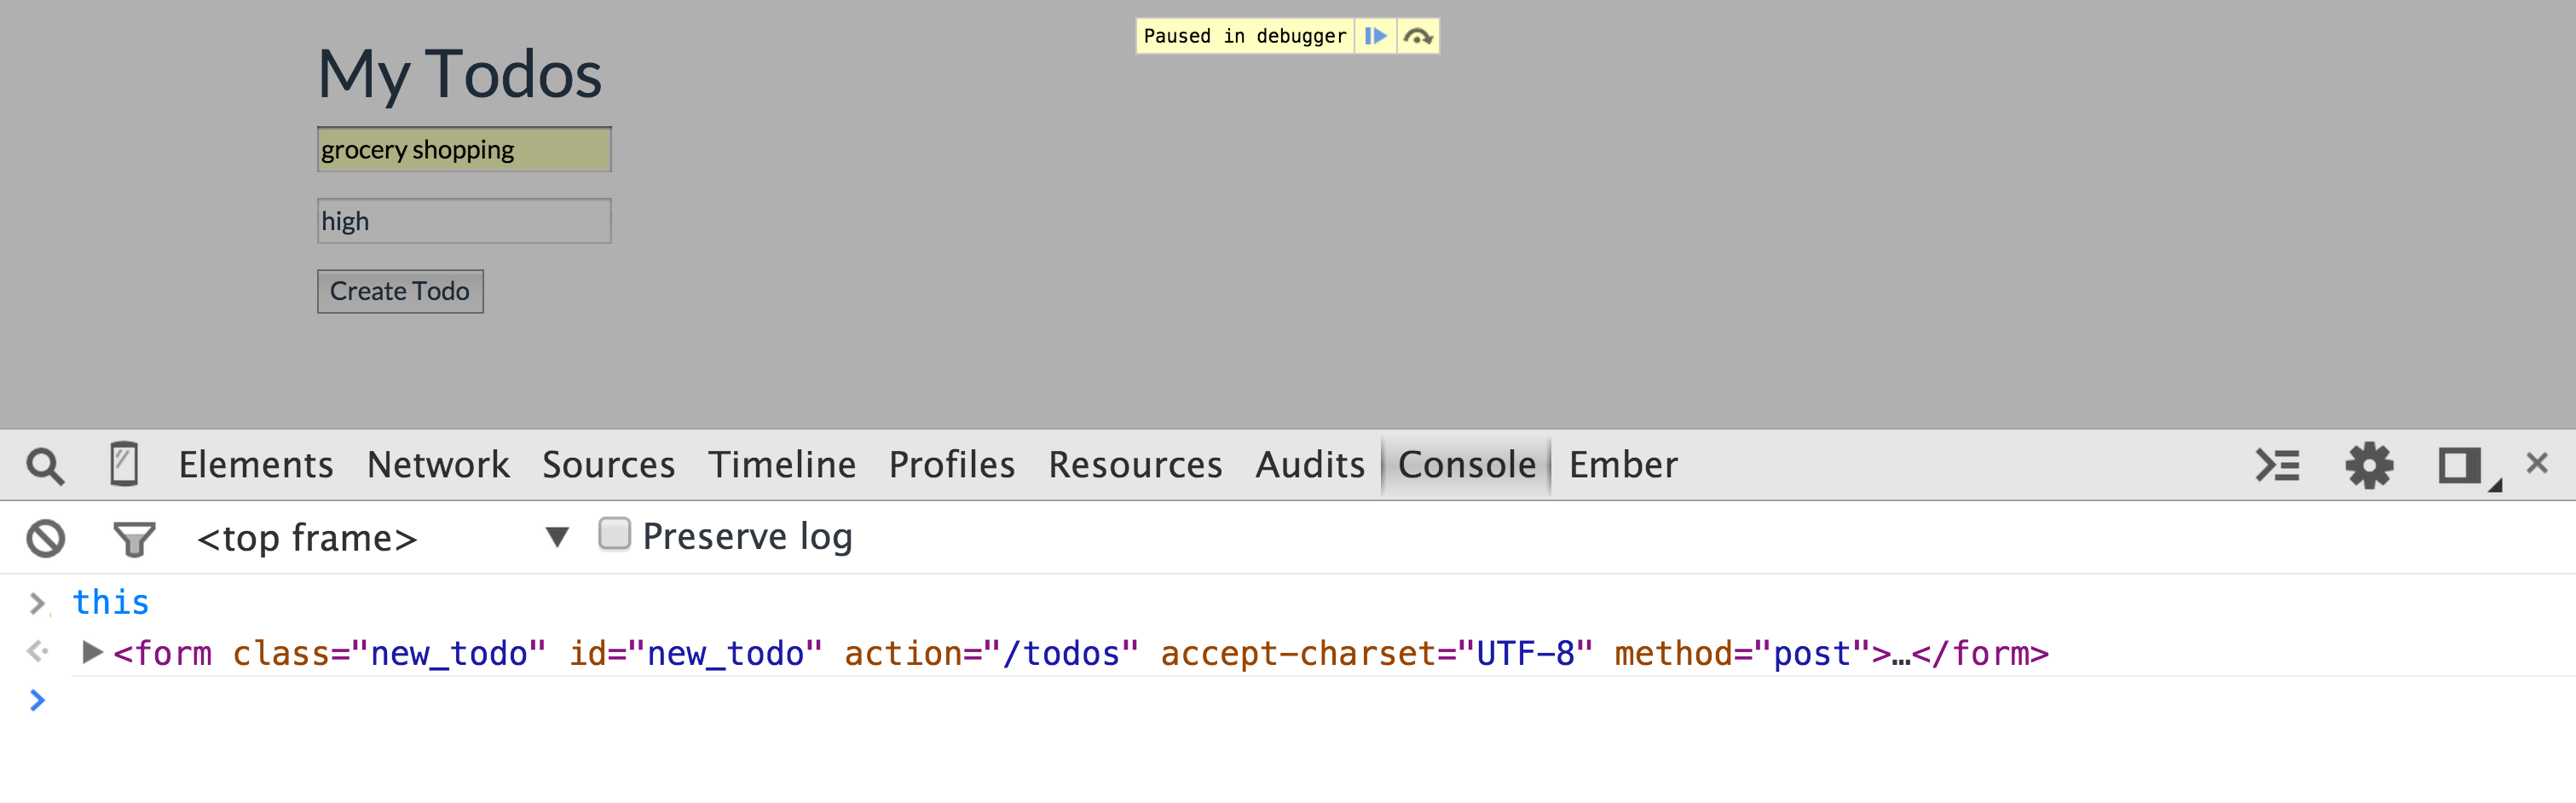
Since our debugger is inside the function that’s attached to the form submission, this is the form itself, and the action and method we need are right there! Let’s use jQuery to grab them, using the handy .attr() method.

1 2 3 4 5 6 7 8 9 | |
Of course, we also need the text we entered into the form for the todo description and priority level. If we open up the form element and all the divs that live inside of it in our console, we see that Rails gave our inputs some nice ids that we can use to select them with. Specifically, there’s an input with an id of “todo_description” and an input with an id of “todo_priority”. Lets grab these using the jQuery .find() method.

We don’t see the values that we typed into the form yet, but we can pull them out using the jQuery .val() method.
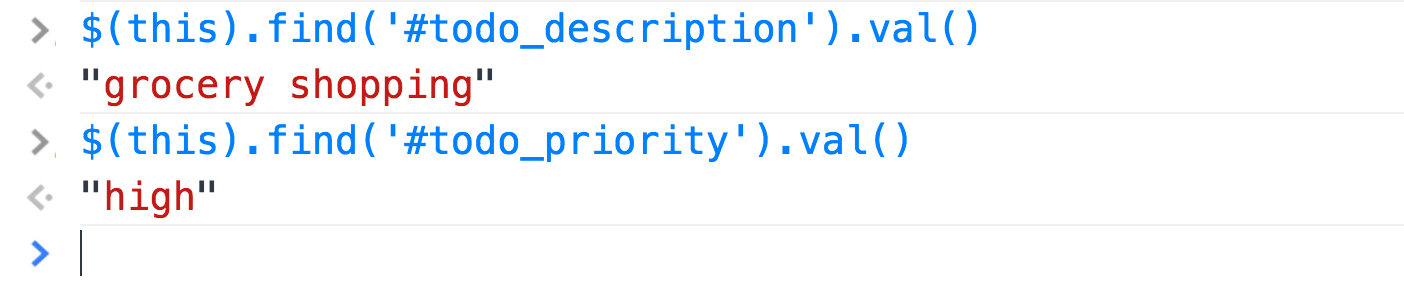
Great! Let’s store these values as variables so we can pass them in to our Ajax request.
1 2 3 4 5 6 7 8 9 10 11 12 | |
We are ready for the next step!
Make the Ajax Request
We are going to make an Ajax request that will deliver a JavaScript response to the create action in the todos controller.
The jQuery documentation for writing Ajax requests is really nice, so here’s some code I pulled from there:
1 2 3 4 5 | |
If we change the method, url, and data to the variables we created, we should be good to go! Our todos.js should now look like this:
1 2 3 4 5 6 7 8 9 10 11 12 13 14 15 16 17 18 | |
Since we’re expecting this Ajax request to hit the create action in the todos controller, let’s put a binding.pry in there (make sure you’ve added gem 'pry' to your Gemfile and run bundle install first):
1 2 3 4 5 6 | |
Here’s what you’ll see when that binding gets hit:
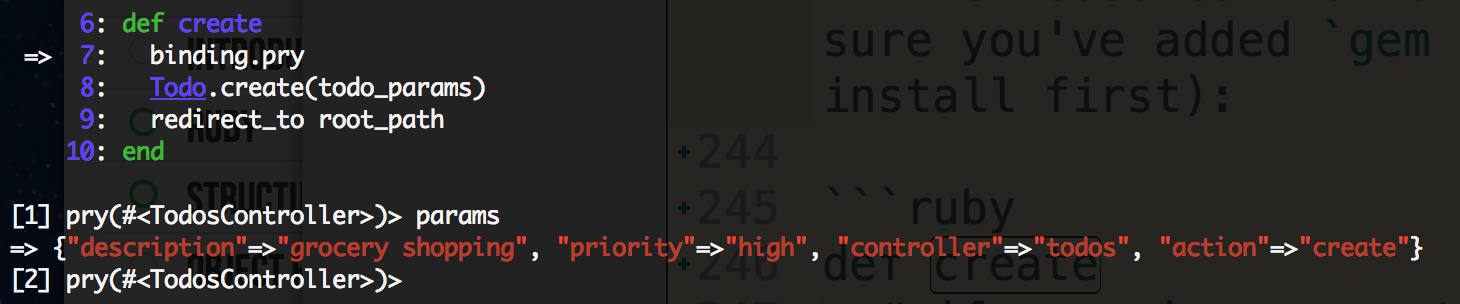
Success! The Ajax request went where we wanted it to go and it sent the params through the way we told it to. But params is not quite right. Since we’re using strong params, we need a nested structure where “todo” is a top level key. By changing our Ajax request to include data: { todo: {description: description, priority: priority} } this problem is solved, but there’s actually a jQuery method, .serializeArray(), that will take care of turning all our form data into a nicely structured object (nesting included!) that we can use in our Ajax call. Here’s how it looks in our code:
1 2 3 4 5 6 7 8 | |
Now our params will be structured the way Rails expects them to be, and we can move on to the next step!
Handle the Response
We’re still in the todos controller create action, and we’re now able to instantiate new todos using the nicely structured params that we sent via Ajax. Currently, after creating the new Todo, we are just redirecting to the root_path. But the whole point of using Ajax is not to redirect. By default, a rails controller action handles responses that are sent in as html strings. We now want to tell it to respond to JavaScript:
1 2 3 4 5 6 7 8 9 10 11 | |
Before going further into what Rails will do with this JavaScript response, there’s one more problem with our Ajax request. We did not tell it to send back JavaScript! Let’s do that now, and our Ajax call should look like this:
1 2 3 4 5 6 7 8 | |
So now that we’re getting the response we want, what is format.js { } actually doing?
When Rails sees that line of code, it will automatically look for a file with the path app/views/<controller name>/<action name>.js.erb. In our example, it’s looking for app/views/todos/create.js.erb.
Make that file and throw a debugger in there to confirm that it’s actually where we land when we get out of the create action.
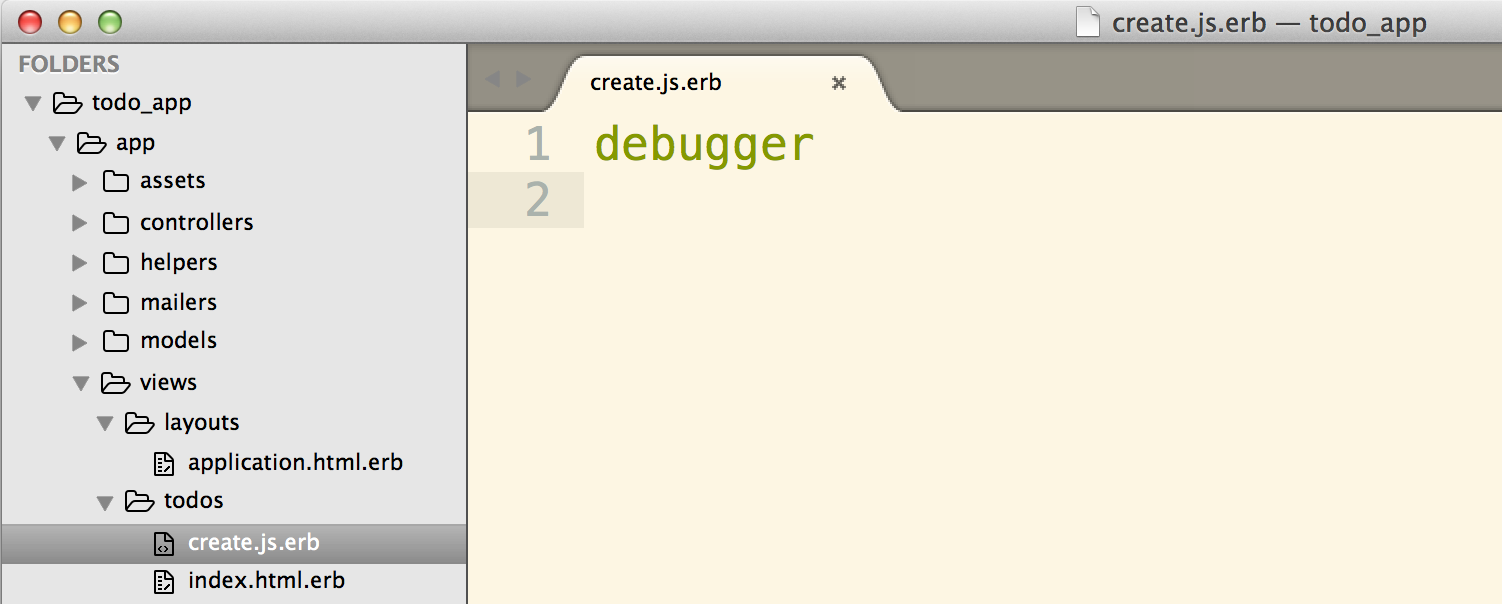
That worked! So now that we are in create.js.erb, we have access to any instance variables we created in the controller action that led us there, and we can write JavaScript and ERB (embedded Ruby) code to do whatever we want with our view. We should probably save our newly created todo in an instance variable for just that purpose.
1 2 3 4 5 6 7 8 | |
So what do we want to do next? In create.js.erb, we want to use JavaScript (or jQuery) to append the new todo to the <ul> where the todos live on the page.
We could do something like this:
1 2 3 | |
Now, when we enter a new todo description and priority and hit the submit button, it appears on the page and no reloading happens! That’s great, but it could use some refactoring.
- It’s not DRY: we basically copied and pasted code from our index.html.erb. If the way we want to render todos ever changes, we now have to change it in two places.
- It’s ugly. That html string is pretty hard to read, and what’s that
escape_javascriptdoing in there? We need that or thelink_towill be evaluated as JavaScript and the whole thing breaks.
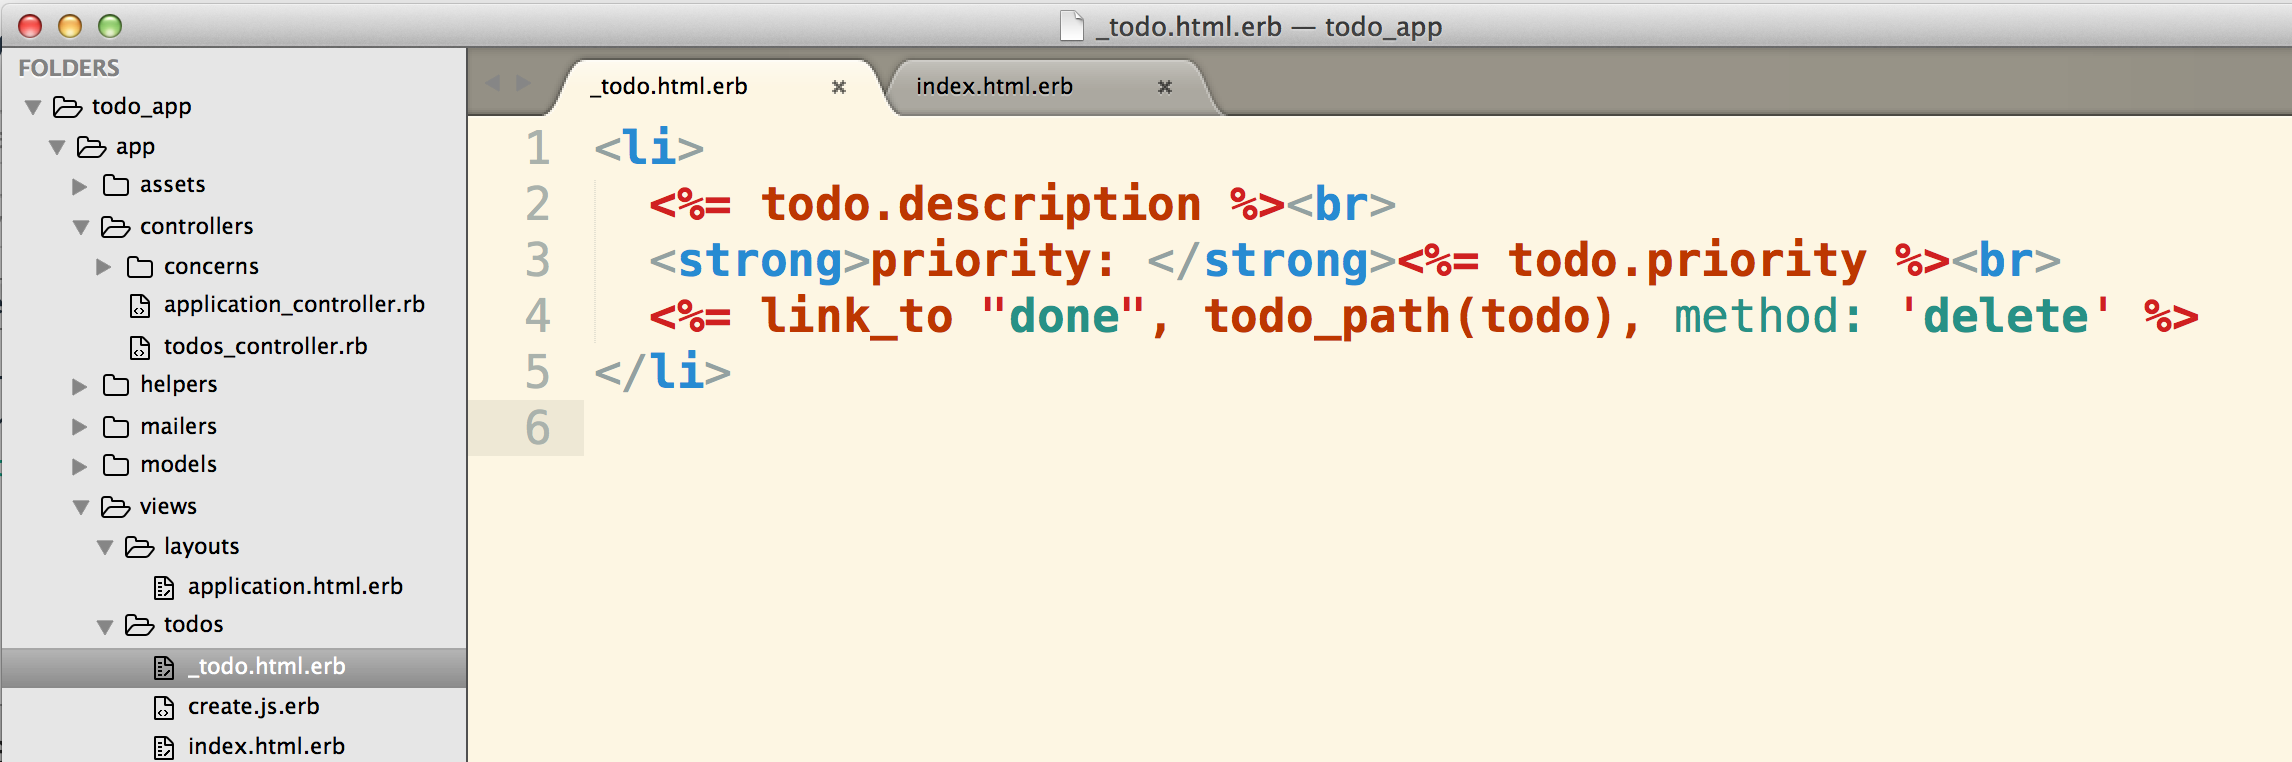
The solution to this? A partial. Extract the code for displaying a single todo out of index.html.erb and place it in a new file at app/views/todos/_todo.html.erb:
Now you can use Rails magic to render the @todos collection in index.html.erb:
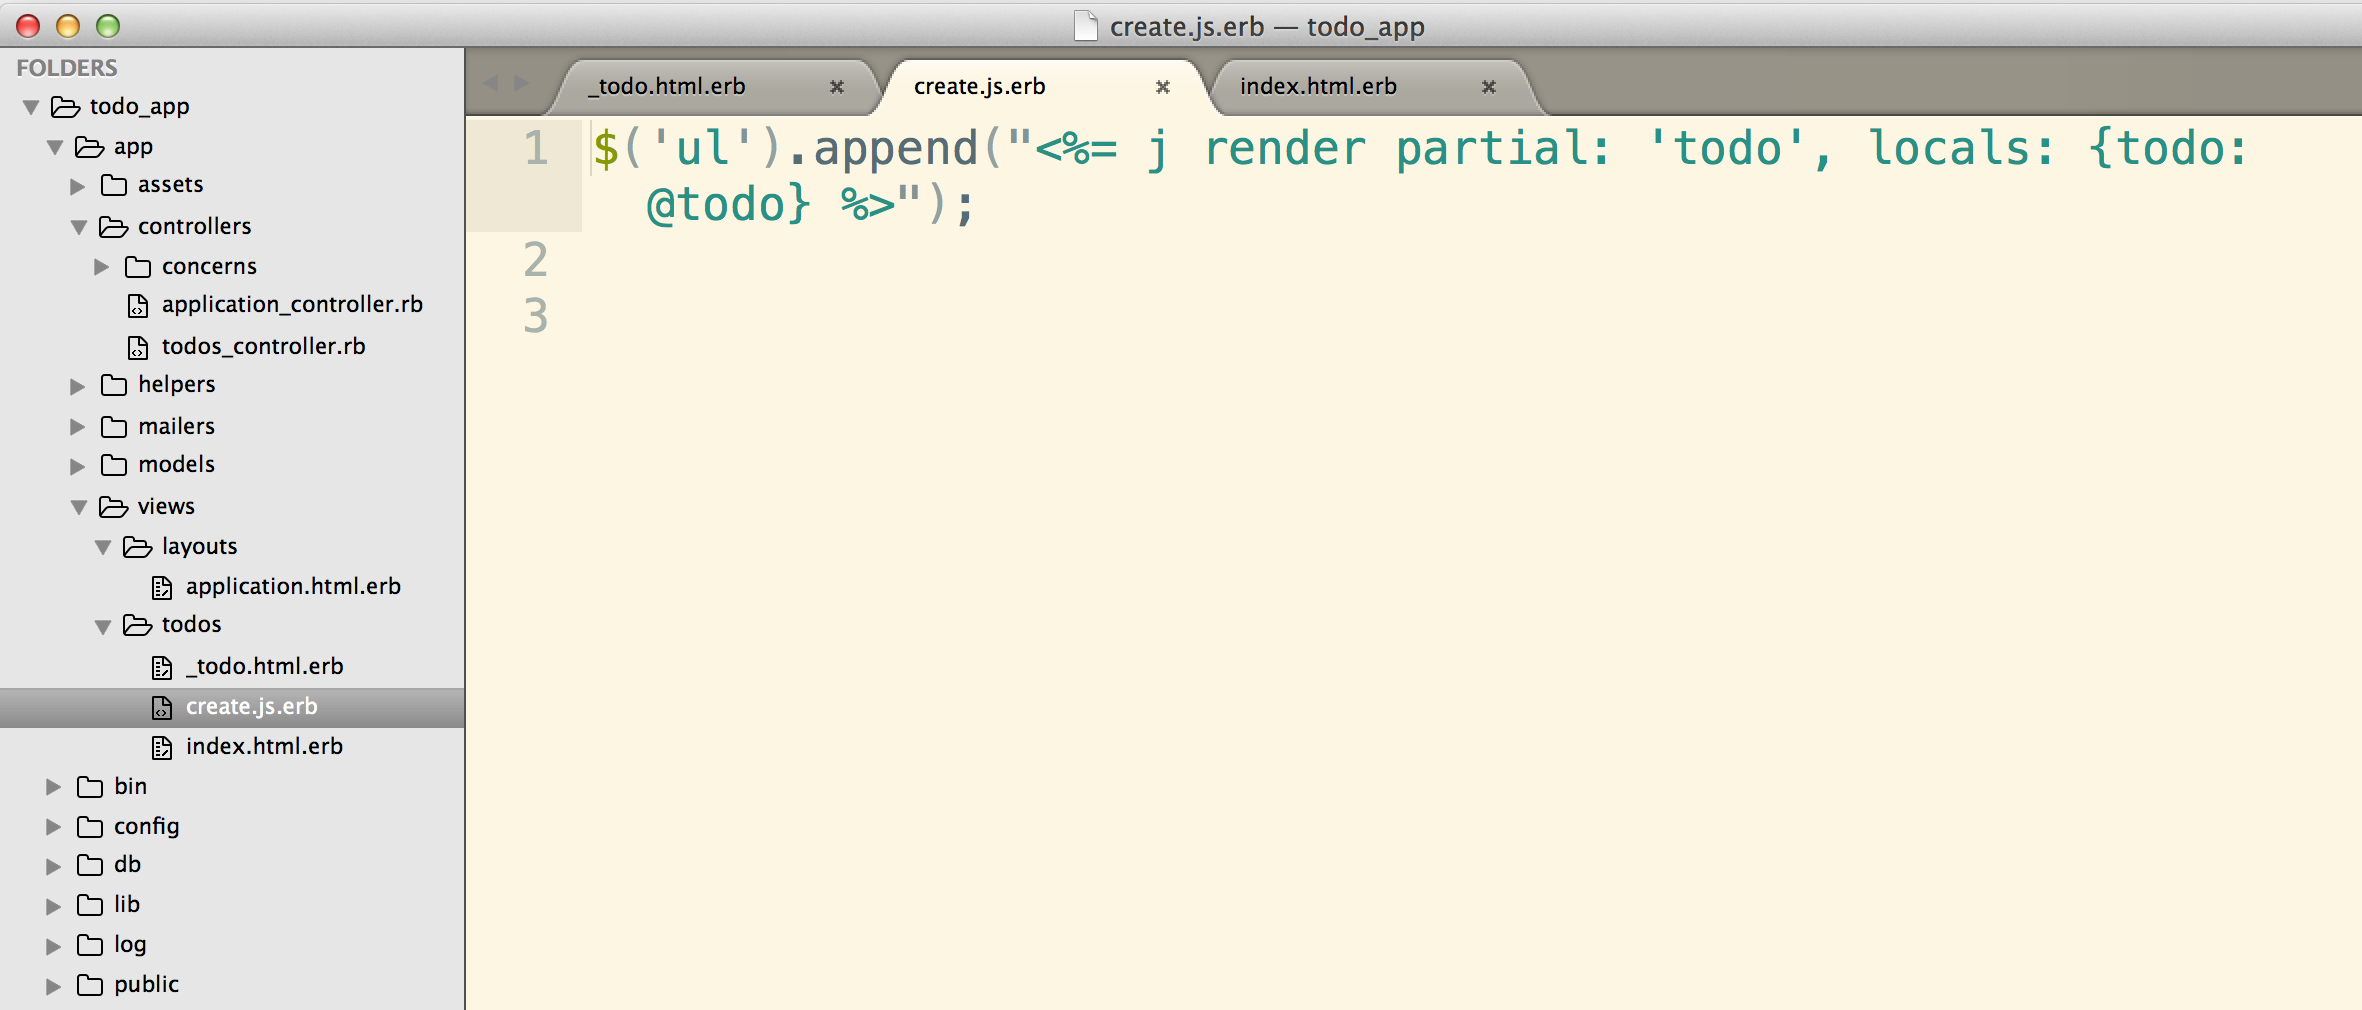
Finally, replace the html string we had in create.js.erb with code for rendering the partial, passing in @todo as a local variable:
And we’re done creating todos with Ajax! In the next section, we’ll refactor our code by using remote: true.
Refactoring with remote: true
In Rails, both form_for and link_to helpers can take an argument of remote: true:
Example: link_to with remote: true
1
| |
In the case of our todo list app, we will add remote: true to our form for creating a new todo (the only change here is on the first line of the form):
1 2 3 4 5 6 7 8 9 10 11 12 13 14 | |
So, what does remote: true do for you? In short, it adds a data-remote="true" attribute to the generated html form as seen here, and submits the form via Ajax automagically. As with everything in Rails, there’s metaprogramming going on under the hood. In this case, the JavaScript code that we wrote to hijack the submit event and make the appropriate Ajax request is all generated for you behind the scenes. If you’re feeling extra curious, check out the Rails.js source code.
Here’s a small snippet from the source code linked to above. Not so surprisingly, it looks a lot like the code we wrote (especially lines 2-4!):
1 2 3 4 5 6 7 8 9 10 11 | |
Because Rails is providing all of this JavaScript for us, now that we’ve added remote: true to the form, we can get rid of everything in our todos.js file.
Before adding remote: true:
1 2 3 4 5 6 7 8 9 10 11 12 13 14 15 16 17 18 19 | |
After adding remote: true:
1
| |
Just like when we manually wrote out the Ajax call, when the form is submitted the default behavior will be prevented and a JavaScript response will be sent to the create action in the todos controller. The controller will then send us to app/views/todos/create.js.erb, just as it did before. We will leave the rest of our code as is, and we are done with our refactoring!
Deleting todos with remote: true
Now that we’ve seen the beautiful simplicity of remote: true, let’s see how quick and easy it is to remove todos from the database and the DOM with no refreshing needed:
1) In views/todos/index.html.erb, we have a link that hits the destroy action in the TodosController. Simply add remote: true to it.
Note: At this point it’s also important to give each <li> an id that will help us remove the correct item from the DOM after deleting it.
1 2 3 4 5 6 7 8 9 10 11 12 13 14 15 16 | |
2) Tell the todos#destroy action how to respond_to a JavaScript response:
1 2 3 4 5 6 7 8 9 10 | |
3) Remember that line 7 in the destroy action above will trigger Rails to look for app/views/todos/destroy.js.erb, so create that file and add code to select the todo to remove using jQuery. Let’s make it slideUp():
1
| |
And that’s it. With this simple yet powerful pattern, you can easily ajaxify all the things in all of your Rails apps. If you’re interested in learning more, I’ve listed some handy resources below. Happy coding!
